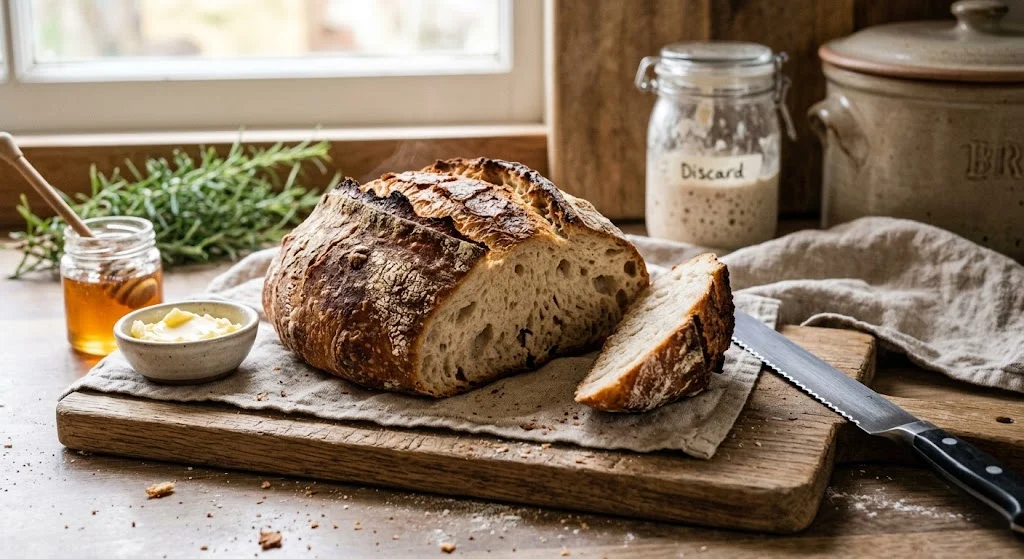
Turn refrigerated, unfed sourdough starter into a rustic homemade loaf without feeding a levain, performing repeated stretch-and-folds, or preheating a Dutch oven.
If you have a jar of unfed sourdough starter in the refrigerator, this unloaf sourdough recipe turns it into a crusty homemade loaf with minimal handling. The method is simple, but the timing still depends on starter strength, dough temperature, flour, and room temperature.
Instead of watching the clock alone, this guide shows you what the dough should look and feel like at each stage so you can make better fermentation decisions.
Quick Answer: What Is Unloaf Sourdough?
Unloaf sourdough is a simplified sourdough method made with unfed starter or discard, minimal dough handling, and a cold Dutch oven. Mix the dough, let it ferment until visibly aerated, shape it, optionally chill it, then bake it in a cold oven.
A dependable starting formula uses 500 grams bread flour, 350 grams water, 100 grams 100%-hydration starter, and 10 grams salt. Fermentation time varies with temperature and starter activity, so use the dough’s appearance and texture as your main guide.
Unloaf Sourdough Recipe at a Glance
| Recipe Detail | Recommendation |
|---|---|
| Yield | 1 large loaf |
| Flour | 500 g bread flour |
| Water | 350 g |
| Unfed starter | 100 g |
| Salt | 10 g |
| Hydration | 70% by the simple water-to-flour calculation |
| Hands-on time | About 15–20 minutes |
| Bulk fermentation | Several hours, depending on temperature and starter activity |
| Cold proof | Optional, about 8–24 hours |
| Baking method | Cold Dutch oven in a cold conventional oven |
| Oven setting | 450°F, then 425°F |
| Finished internal temperature | About 205–210°F |
| Best result | Cool completely before slicing |
Unloaf Sourdough Bread Recipe
A low-fuss loaf made with unfed starter and a cold Dutch oven.
Ingredients
Equipment
- Large mixing bowl
- Kitchen scale
- Bench scraper or sturdy spatula
- Dutch oven with lid
- Parchment paper
- Sharp bread lame or razor
- Wire cooling rack
Instructions
Mix the Starter and Water
Add 100 grams unfed starter and 350 grams water to a large bowl. Stir until the starter is mostly dispersed. A few small streaks are perfectly fine.
Add Flour and Salt
Add 500 grams bread flour and 10 grams salt. Mix with a dough whisk, sturdy spoon, or your hands until no dry flour remains. The dough may look rough and sticky at first.
Bulk Ferment
Cover the bowl and leave it at room temperature. Do not rely on a fixed number of hours. Instead, look for visible expansion, aeration, bubbles, a slightly rounded surface, and a gentle wobble when the bowl moves.
Shape the Dough
Lightly flour your work surface and turn out the fermented dough. Gently gather the edges toward the center, then turn the dough seam-side down. Use your hands or a bench scraper to create gentle surface tension.
Choose Same-Day or Overnight Proofing
For same-day bread, let the shaped dough rest at room temperature until slightly fuller and relaxed. For overnight bread, cover and refrigerate for 8–24 hours.
Score the Loaf
Place the dough on parchment if needed. Use a bread lame or very sharp blade to make one confident slash across the top.
Bake in a Cold Dutch Oven
Place the shaped, scored dough into a cold Dutch oven. Put the covered Dutch oven into a cold conventional oven. Set the oven to 450°F.
Bake covered for approximately 45–60 minutes, depending on your oven and loaf size. Remove the lid and reduce the oven to 425°F. Continue baking until deeply golden and approximately 205–210°F internally.
Cool Before Slicing
Transfer the loaf to a wire rack and let it cool for at least 1–2 hours. The crumb continues setting as the bread cools.
Do not use starter showing mold, pink or orange discoloration, or other obvious signs of contamination. When in doubt about a contaminated starter, discard it rather than trying to bake with it.
What Is Unloaf Sourdough?
Unloaf sourdough is an informal name for a relaxed sourdough technique that removes several traditional steps. The method commonly uses unfed starter, no stretch-and-fold routine, and a cold Dutch oven placed into a cold oven.
The method still relies on natural fermentation, so it isn’t a shortcut around fermentation itself. Instead, you are giving the dough time while using fewer handling steps.
Why Is It Called “Unloaf”?
The name is playful rather than a formal bread classification. The method essentially removes or “undoes” several rules associated with traditional sourdough baking:
🥣 Unfed Starter
Use refrigerated unfed starter instead of building a fresh levain.
🤲 Minimal Handling
Skip the repeated stretch-and-fold routine used in many sourdough methods.
🔥 Cold Dutch Oven
Place the dough into a cold baking vessel instead of transferring it into a preheated pot.
🍞 Simple Shaping
Build enough surface tension for the loaf without elaborate dough handling.
The finished bread is generally a chewy, moderately open loaf with a crisp crust and noticeable sourdough flavor.
Ingredients for Unloaf Sourdough Bread
The ingredient list is short, which makes this recipe especially useful when you have leftover starter but don’t want another complicated baking project.
Bread Flour
Use 500 grams of bread flour for the most forgiving version. Its higher protein content generally provides enough gluten strength for a free-standing loaf.
You can substitute all-purpose flour, but the dough may feel softer and spread more easily.
Unfed Sourdough Starter
Use 100 grams of unfed, 100%-hydration sourdough starter.
The starter does not need to be bubbly and freshly fed. However, discard that has been recently active and then refrigerated tends to be more predictable than starter that has been neglected for weeks.
Water
Use 350 grams of room-temperature water. Water temperature affects fermentation because dough temperature affects yeast activity.
Salt
Use 10 grams fine salt. Salt improves flavor and also affects dough strength and fermentation speed, so don’t casually omit it.
How to Make Unloaf Sourdough
The beauty of this method is that you don’t need a long series of folds. The important part is recognizing when fermentation has progressed far enough.
1. Mix the Starter and Water
Add 100 grams unfed starter and 350 grams water to a large mixing bowl. Stir until the starter is mostly dispersed.
2. Add the Flour and Salt
Add 500 grams bread flour and 10 grams salt. Mix until no dry flour remains.
The dough may look rough, sticky, and undeveloped immediately after mixing. That’s normal. The dough’s structure and aeration will change during fermentation.
3. Cover and Begin Bulk Fermentation
Cover the bowl and leave it at room temperature. Start checking the dough after several hours rather than automatically shaping it according to a fixed timetable.
- Noticeable expansion
- Lighter, more aerated texture
- Bubbles around the edges
- Slightly domed or rounded surface
- A gentle jiggle when the bowl moves
- Smoother and more elastic appearance
You do not necessarily need the dough to double in size. Fermentation should be judged using several visual and textural signals rather than volume alone.
4. Shape the Dough
Lightly flour your work surface and turn out the fermented dough. Gently gather the edges toward the center, then turn the dough seam-side down.
Use your hands or a bench scraper to create gentle surface tension. Avoid aggressively kneading the dough at this stage.
5. Choose Your Proofing Schedule
☀️ Same-Day Bread
Let the shaped dough rest at room temperature until it looks slightly fuller and relaxed.
🌙 Overnight Bread
Cover the shaped dough and refrigerate for 8–24 hours. This makes scheduling easier and can deepen flavor.
6. Score the Dough
When ready to bake, place the dough on parchment if it isn’t already there. Use a bread lame or very sharp blade to make one confident slash across the top.
7. Bake in a Cold Dutch Oven
Place the shaped, scored dough into a cold Dutch oven. Put the covered Dutch oven into a cold conventional oven.
Set the oven to 450°F and bake covered for about 45–60 minutes. Remove the lid and reduce the oven to 425°F. Continue baking until the crust is deeply golden and the loaf reaches approximately 205–210°F internally.
8. Cool Before Slicing
Transfer the bread to a wire rack and let it cool for at least 1–2 hours. Cutting the loaf while piping hot can leave the interior gummy even when the bread is fully baked.
How to Know When the Dough Is Ready
Fermentation is the hardest part of unloaf sourdough because the same recipe can behave differently in different kitchens.
A dough mixed in a 68°F kitchen will not necessarily finish when the same dough mixed in a 78°F kitchen does.
Signs of Good Fermentation
- The dough has visibly expanded instead of remaining dense.
- Bubbles appear along the sides or underneath the surface.
- The dough feels lighter and more inflated.
- The surface looks smoother and slightly rounded.
- The bowl moves with a gentle wobble.
- The dough stretches more easily than immediately after mixing.
A clock is useful for planning, but the dough should make the final decision about when bulk fermentation is complete.
Temperature Matters
Dough temperature is a major factor in fermentation consistency. Use the table below as a practical starting point rather than a rigid timetable.
| Kitchen Temperature | General Expectation |
|---|---|
| 65–68°F | Slower fermentation |
| 70–73°F | Moderate fermentation |
| 74–78°F | Faster fermentation |
| Above 78°F | Check the dough more frequently |
These temperatures are guidelines, not guarantees. Starter strength, flour, water temperature, dough temperature, and kitchen conditions all affect fermentation.
Which Sourdough Starter Should You Use?
Not every jar of discard behaves the same way. A recently fed starter that has risen and fallen generally contains more usable fermentation activity than very old, neglected discard.
Best Choices
- Recently peaked and fallen starter for predictable results.
- Refrigerated discard from the past several days for stronger sour flavor.
- Starter fed within the previous week for a balance of flavor and fermentation.
- Room-temperature unfed starter when it still has noticeable activity.
Be Careful With Very Old Discard
Old starter can become extremely acidic and may have little remaining leavening strength. If your discard has been neglected for a long time, don’t assume the recipe’s normal fermentation window will apply.
Mold, pink or orange discoloration, or other signs of contamination are reasons to discard the starter rather than bake with it.
Cold Dutch Oven vs. Preheated Dutch Oven
The cold-start method is one of the defining features of unloaf bread. A preheated Dutch oven is widely used for traditional sourdough, but it requires transferring dough into extremely hot cookware.
The cold-start approach simplifies that step. It is not automatically better; it is simply easier and less demanding from a handling standpoint.
| Method | Main Advantage | Main Consideration |
|---|---|---|
| Cold Dutch oven | Easier and less intimidating | Baking time varies with oven and cookware |
| Preheated Dutch oven | Established traditional baking approach | Hot-pot dough transfer is more demanding |
| Cold oven + cold pot | Minimal setup | Results can vary between ovens |
| Preheated oven + cold pot | Faster overall heating | Not the classic cold-start method |
Same-Day vs. Overnight Unloaf Sourdough
☀️ Same-Day Method
Choose this schedule when you want fresh bread without planning the night before. Allow enough room-temperature fermentation before shaping.
This works especially well when your starter has reasonable activity and your kitchen isn’t unusually cold.
🌙 Overnight Method
Refrigerate the shaped loaf for 8–24 hours. This makes the recipe easier to fit around work and family schedules.
Cold dough can also be easier to score cleanly.
Troubleshooting Unloaf Sourdough
A simple recipe doesn’t mean every loaf behaves perfectly. Start troubleshooting with the dough before immediately changing the ingredients.
My Dough Barely Rose
Your starter may have been too weak, your kitchen may be cold, or the dough may simply need more time.
Give it additional fermentation time before shaping. If the problem happens repeatedly, try using younger discard or recently fed starter.
My Dough Spread Flat
Possible causes include:
- Over-fermentation
- Weak gluten development
- Very soft flour
- Excessive hydration
- Unusually liquid starter
Next time, stop bulk fermentation earlier and use bread flour.
My Loaf Is Dense
A dense crumb often points toward insufficient fermentation, especially when using older refrigerated discard.
Look for stronger expansion and more visible aeration before shaping.
My Bread Is Gummy
First check that the loaf was fully baked. A thermometer reading around 205–210°F is a useful doneness reference for this style of loaf.
Also make sure you allow the bread to cool before slicing.
My Crust Is Too Dark
Remove the lid earlier or reduce the uncovered baking time. Dark bottoms can also happen with some Dutch ovens and oven racks.
If your particular pot consistently burns the base, move the rack higher or use an additional baking sheet underneath the Dutch oven.
My Loaf Has Little Oven Spring
Check fermentation first. Over-fermented dough can lose structure, while under-fermented dough may lack enough gas development.
Scoring also matters. One clean, deliberate slash gives expanding dough a controlled place to open.
Change one variable at a time when possible. Keeping notes on starter age, temperature, fermentation time, and baking results makes it much easier to identify what actually changed.
Flour Substitutions for Unloaf Bread
All-Purpose Flour
Use 1:1 by weight. Depending on the flour, the dough may be somewhat softer and less elastic.
Whole-Wheat Flour
Replace part of the bread flour rather than immediately replacing all of it. Start with 10–25% whole-wheat flour for more wheat flavor without dramatically changing the dough.
Rye Flour
Rye adds strong flavor but behaves differently from wheat flour. For a beginner-friendly loaf, use a small percentage rather than replacing the entire flour amount.
Easy Unloaf Sourdough Variations
Once the basic loaf works, variations become much easier. Keep the base dough familiar while changing one flavor component at a time.
🧄 Garlic & Rosemary
- Add roasted garlic.
- Add chopped fresh rosemary.
- Keep the base dough unchanged.
- Excellent with soups and roasted vegetables.
🌶️ Cheddar & Jalapeño
- Add shredded sharp cheddar.
- Add finely chopped jalapeño.
- Fold additions in gently.
- Watch the loaf because cheese can brown faster.
🥯 Everything-Seasoned
- Add everything seasoning to the dough or crust.
- Use a light hand because the blend may contain salt.
- Excellent for breakfast toast and sandwiches.
🧀 Parmesan & Black Pepper
- Add finely grated Parmesan.
- Add freshly cracked black pepper.
- Pair with tomato soup or pasta.
🌾 Whole-Wheat Unloaf
- Replace 10–25% of bread flour with whole-wheat flour.
- Expect a slightly denser crumb.
- Allow additional fermentation only if the dough needs it.
How to Serve Unloaf Sourdough
Fresh unloaf sourdough is especially good when the crust is crisp and the crumb is still slightly chewy.
Classic
- Salted butter and flaky salt
- Scrambled eggs
- Avocado and black pepper
- Sharp cheddar
Meal Pairings
- Tomato soup
- Grilled cheese
- Egg salad
- Roasted vegetables
Simple & Savory
- Olive oil and balsamic vinegar
- Sharp cheese
- Herbed butter
Sweet
- Sourdough French toast
Slice the loaf with a serrated bread knife rather than pressing down with a chef’s knife. This helps preserve the crust and crumb structure.
How to Store Homemade Unloaf Bread
Once completely cooled, keep the loaf at room temperature in a bread bag, paper bag, or bread box.
Avoid sealing a still-warm loaf tightly. Trapped steam can soften the crust and encourage moisture buildup.
For longer storage, slice the cooled bread and freeze it in an airtight freezer-safe bag or container.
| Storage Method | Best Use |
|---|---|
| Room temperature | Best for short-term eating |
| Freezer | Best for longer storage |
| Refrigerator | Usually not ideal for preserving bread texture |
| Sliced before freezing | Makes individual portions easier to toast |
Slice completely cooled bread before freezing so you can remove only the amount you need for toast or sandwiches.
Equipment You Actually Need
Essential
- Large mixing bowl
- Kitchen scale
- Bench scraper or sturdy spatula
- Dutch oven with lid
- Parchment paper
- Sharp bread lame or razor
- Wire cooling rack
Helpful but Optional
- Instant-read thermometer
- Banneton
- Dough whisk
- Rice flour
- Reusable bowl cover
A kitchen scale is especially valuable because measuring flour by volume can introduce significant differences between bakers.
Baker’s Percentage for This Recipe
For readers who want to scale the recipe, the formula is straightforward.
Because the starter contains equal weights of flour and water, the effective hydration is slightly different from the simple 70% water-to-flour calculation. This matters when comparing this dough with other sourdough formulas.
How to Make the Recipe More Predictable
If you bake sourdough regularly, consistency comes from controlling the variables you can control.
Keep Notes on Each Bake
- Starter age
- Starter temperature
- Kitchen temperature
- Water temperature
- Flour brand
- Bulk fermentation time
- Cold-proof duration
- Baking time
- Final internal temperature
- Crumb texture
After two or three loaves, those notes can become more useful than a generic fermentation timetable.
Focus on Dough Temperature
Dough temperature is one of the best ways to understand why the same recipe behaves differently from one day to another. You don’t need laboratory precision.
Simply noticing that your dough was 68°F one day and 78°F the next can help explain a surprisingly large change in fermentation time.
Frequently Asked Questions
Can I make unloaf sourdough with active starter?
Yes. Active starter can be used in place of unfed discard, but it may ferment the dough faster. Start checking the dough earlier rather than following the same clock.
Can I use sourdough discard straight from the refrigerator?
Yes, provided the discard is wholesome and free from signs of contamination. Cold starter can slow the beginning of fermentation, so expect the dough to take longer to become active.
Do I have to cold-proof unloaf sourdough?
No. You can bake after the shaped dough has rested sufficiently at room temperature. An overnight refrigerator proof is mainly useful for scheduling, flavor development, and easier scoring.
Why is my unloaf sourdough not rising?
The most common possibilities are weak starter, a cold environment, or insufficient fermentation time. Give the dough more time and consider using newer, more active discard in your next batch.
Can I use all-purpose flour?
Yes. All-purpose flour can replace bread flour by weight. Depending on the flour, the dough may be softer and the finished loaf may have slightly less structure.
Can I bake unloaf sourdough without a Dutch oven?
Yes. A Dutch oven is helpful because the covered environment traps moisture around the dough, but other covered baking vessels may work if they are rated for the oven temperature. A loaf pan can also produce a different, more sandwich-style loaf.
Why should I wait before slicing sourdough bread?
Cooling allows the crumb to finish setting. Cutting too soon can make the interior seem gummy even when the bread is properly baked.
Read More :